After letting Windows apps like Paint and Photos languish, Microsoft has brought them back with a vengeance. And Windows Photos now has one of the better features you could ask for in any app: Generative Erase.
I like features that don’t take a lot of explanation, tutorials, or anything else. They should be intuitive and just work. And you know what? Generative Erase does just that — about as well as Photoshop does, too, and for free. Microsoft is rolling it out to Windows 11 right now, and Windows 10 users should see it, too.
get windows 11 pro for free
Windows 11 Pro
Best Prices Today: €49.99 at PC-WELT Software-Shop – Windows 11 Home | €69.99 at PC-WELT Software-Shop – Windows 11 Pro
You’ll want to use Generative Erase if you’ve ever taken a photo and want to remove those one or two objects that get in the way of a perfect shot. Maybe it was a photo of the beach, with a stray dog running in the background. Maybe it was a vacation photo…and your ex- snuck into the shot. Either way, Photos’ Generative Erase feature uses AI to interpret what you want cut out, and what it should be replaced with.
If you’re a longtime user of Photos, you’re probably aware that Microsoft has flirted on and off with an editing technology called Spot Fix. For me, Spot Fix has always been invaluable. You have no idea how much otherwise unseen dust and grime can make its way onto a laptop or peripheral, showing itself only after I’ve taken the picture. With Spot Fix, I can encircle the bit of dust or grime, click, and…boom! It’s gone. Generative Erase is like the improved version of Spot Fix: It simply allows you to “paint” an area you want removed.
How to use Generative Erase within Microsoft Photos
To use Generative Erase within Photos, you must first launch Photos. You can type Photos in Windows Search to launch it, or right-click an image file in File Explorer and open the app via that method. Photos won’t automatically save any edits you make without your permission, but you might want to make a copy of the file first, just to be safe.
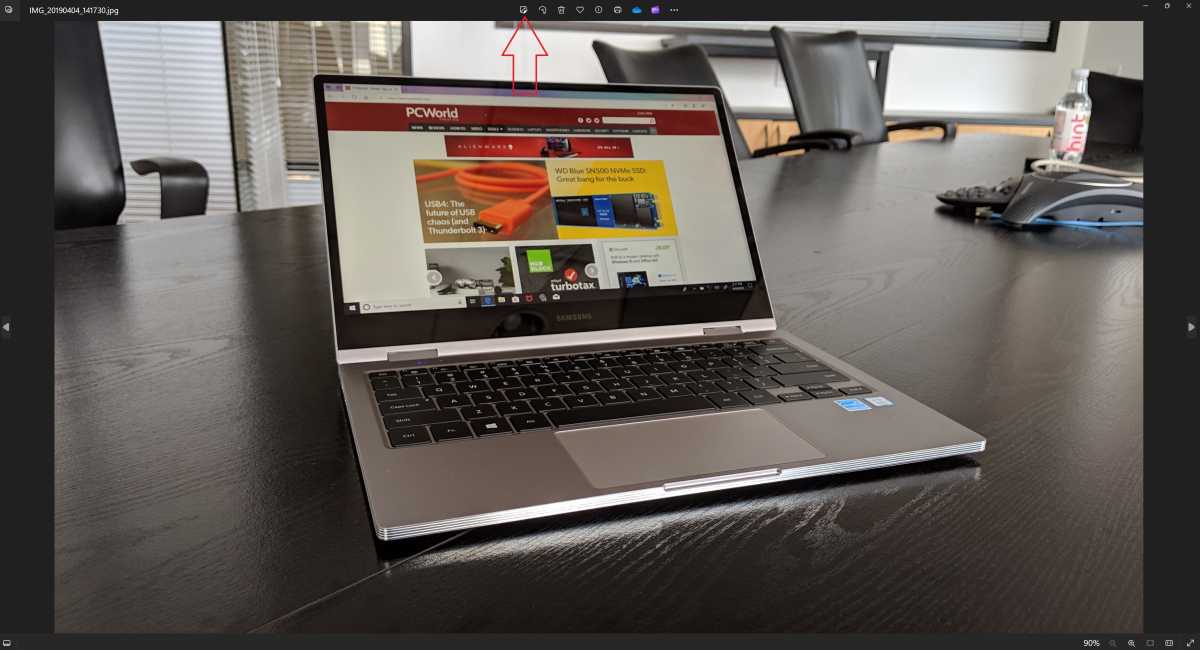
When the photo file opens, you’ll need to then select the editing icon, which is the teeny-tiny little icon to the far left.
Mark Hachman / IDG
Mark Hachman / IDG
Mark Hachman / IDG
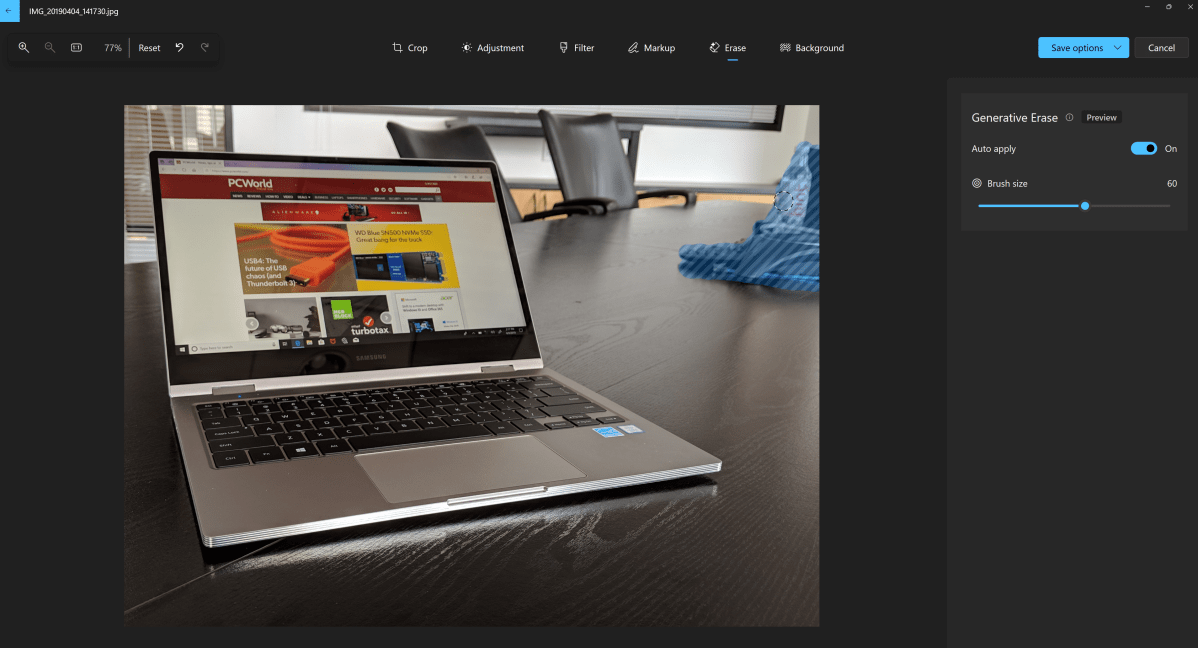
Photos offers a number of editing options, from basic crops to an AI filtering option that can be found under the Filter tab. But Generative Erase is in its own tab second from the right, marked “Erase.”

Mark Hachman / IDG
Mark Hachman / IDG
Mark Hachman / IDG
To use Generative Erase, you’ll need to “paint” the area that you want Photos to erase. I’d recommend that you first toggle off the “Auto Apply” option. Otherwise, the erase effect will be applied every time you click and release. That’s just fine for a small edit, but if you want to fine-tune your selection you’ll want the extra control.
Note that you can adjust the size of the “brush” or circle, and choose to add or subtract the mask. That’s a fancy way of saying that you have the option to “paint” the area in which you want to erase, but subtracting the mask allows you to trim it down if you’ve gone too far. When you’re ready, click “Erase.”
Use Generative Erase to “paint” over the stuff you want to remove.
Use Generative Erase to “paint” over the stuff you want to remove.
Mark Hachman / IDG
Use Generative Erase to “paint” over the stuff you want to remove.
Mark Hachman / IDG
Mark Hachman / IDG
This isn’t the only AI-dependent editing function within Photos; the Background tab on the far right let’s you use AI to remove the background entirely, if that suits you.
Photoshop vs. Photos: Which erases unwanted objects the best?
Because I couldn’t just stop there, I wanted to know whether Photos’ Generative Erase actually does a better job than the granddaddy of photo editors, Adobe Photoshop. I use Photoshop all the time for something Photos can’t do: Generative Expand, which uses AI to add part of the photo that never existed. It’s really helpful when vendors provide a narrow product shot and I need to “extend” the photo’s background to fit our image parameters.
I compared Photos’ Generative Erase to two Photoshop functions: the Remove tool, which is essentially Adobe’s version of Generative Erase; and the sort-of backwards Generative Fill option, where I used the Photoshop Magic Lasso to outline an object, then used the Generative Fill option to remove the object and fill it in with an AI-generated background. The latter isn’t all that intuitive, but it works.
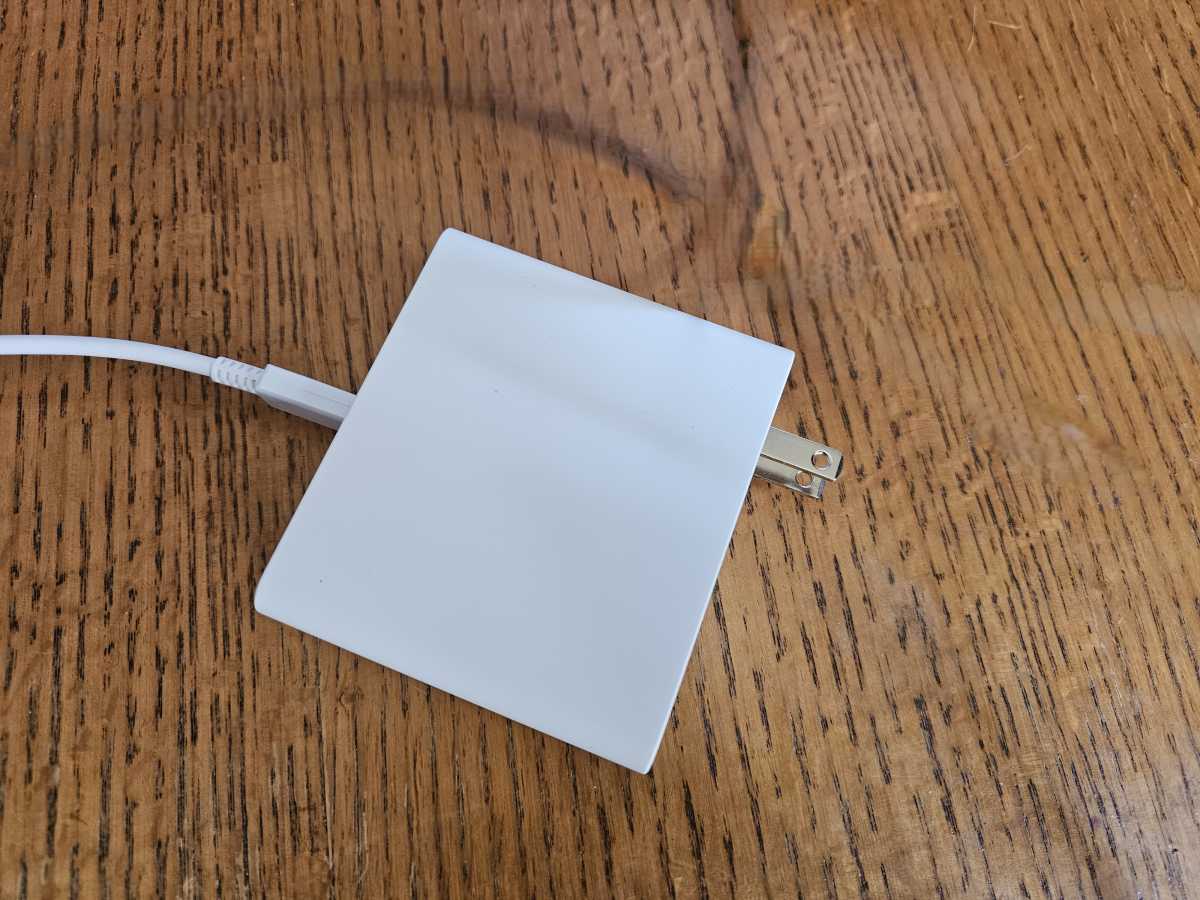
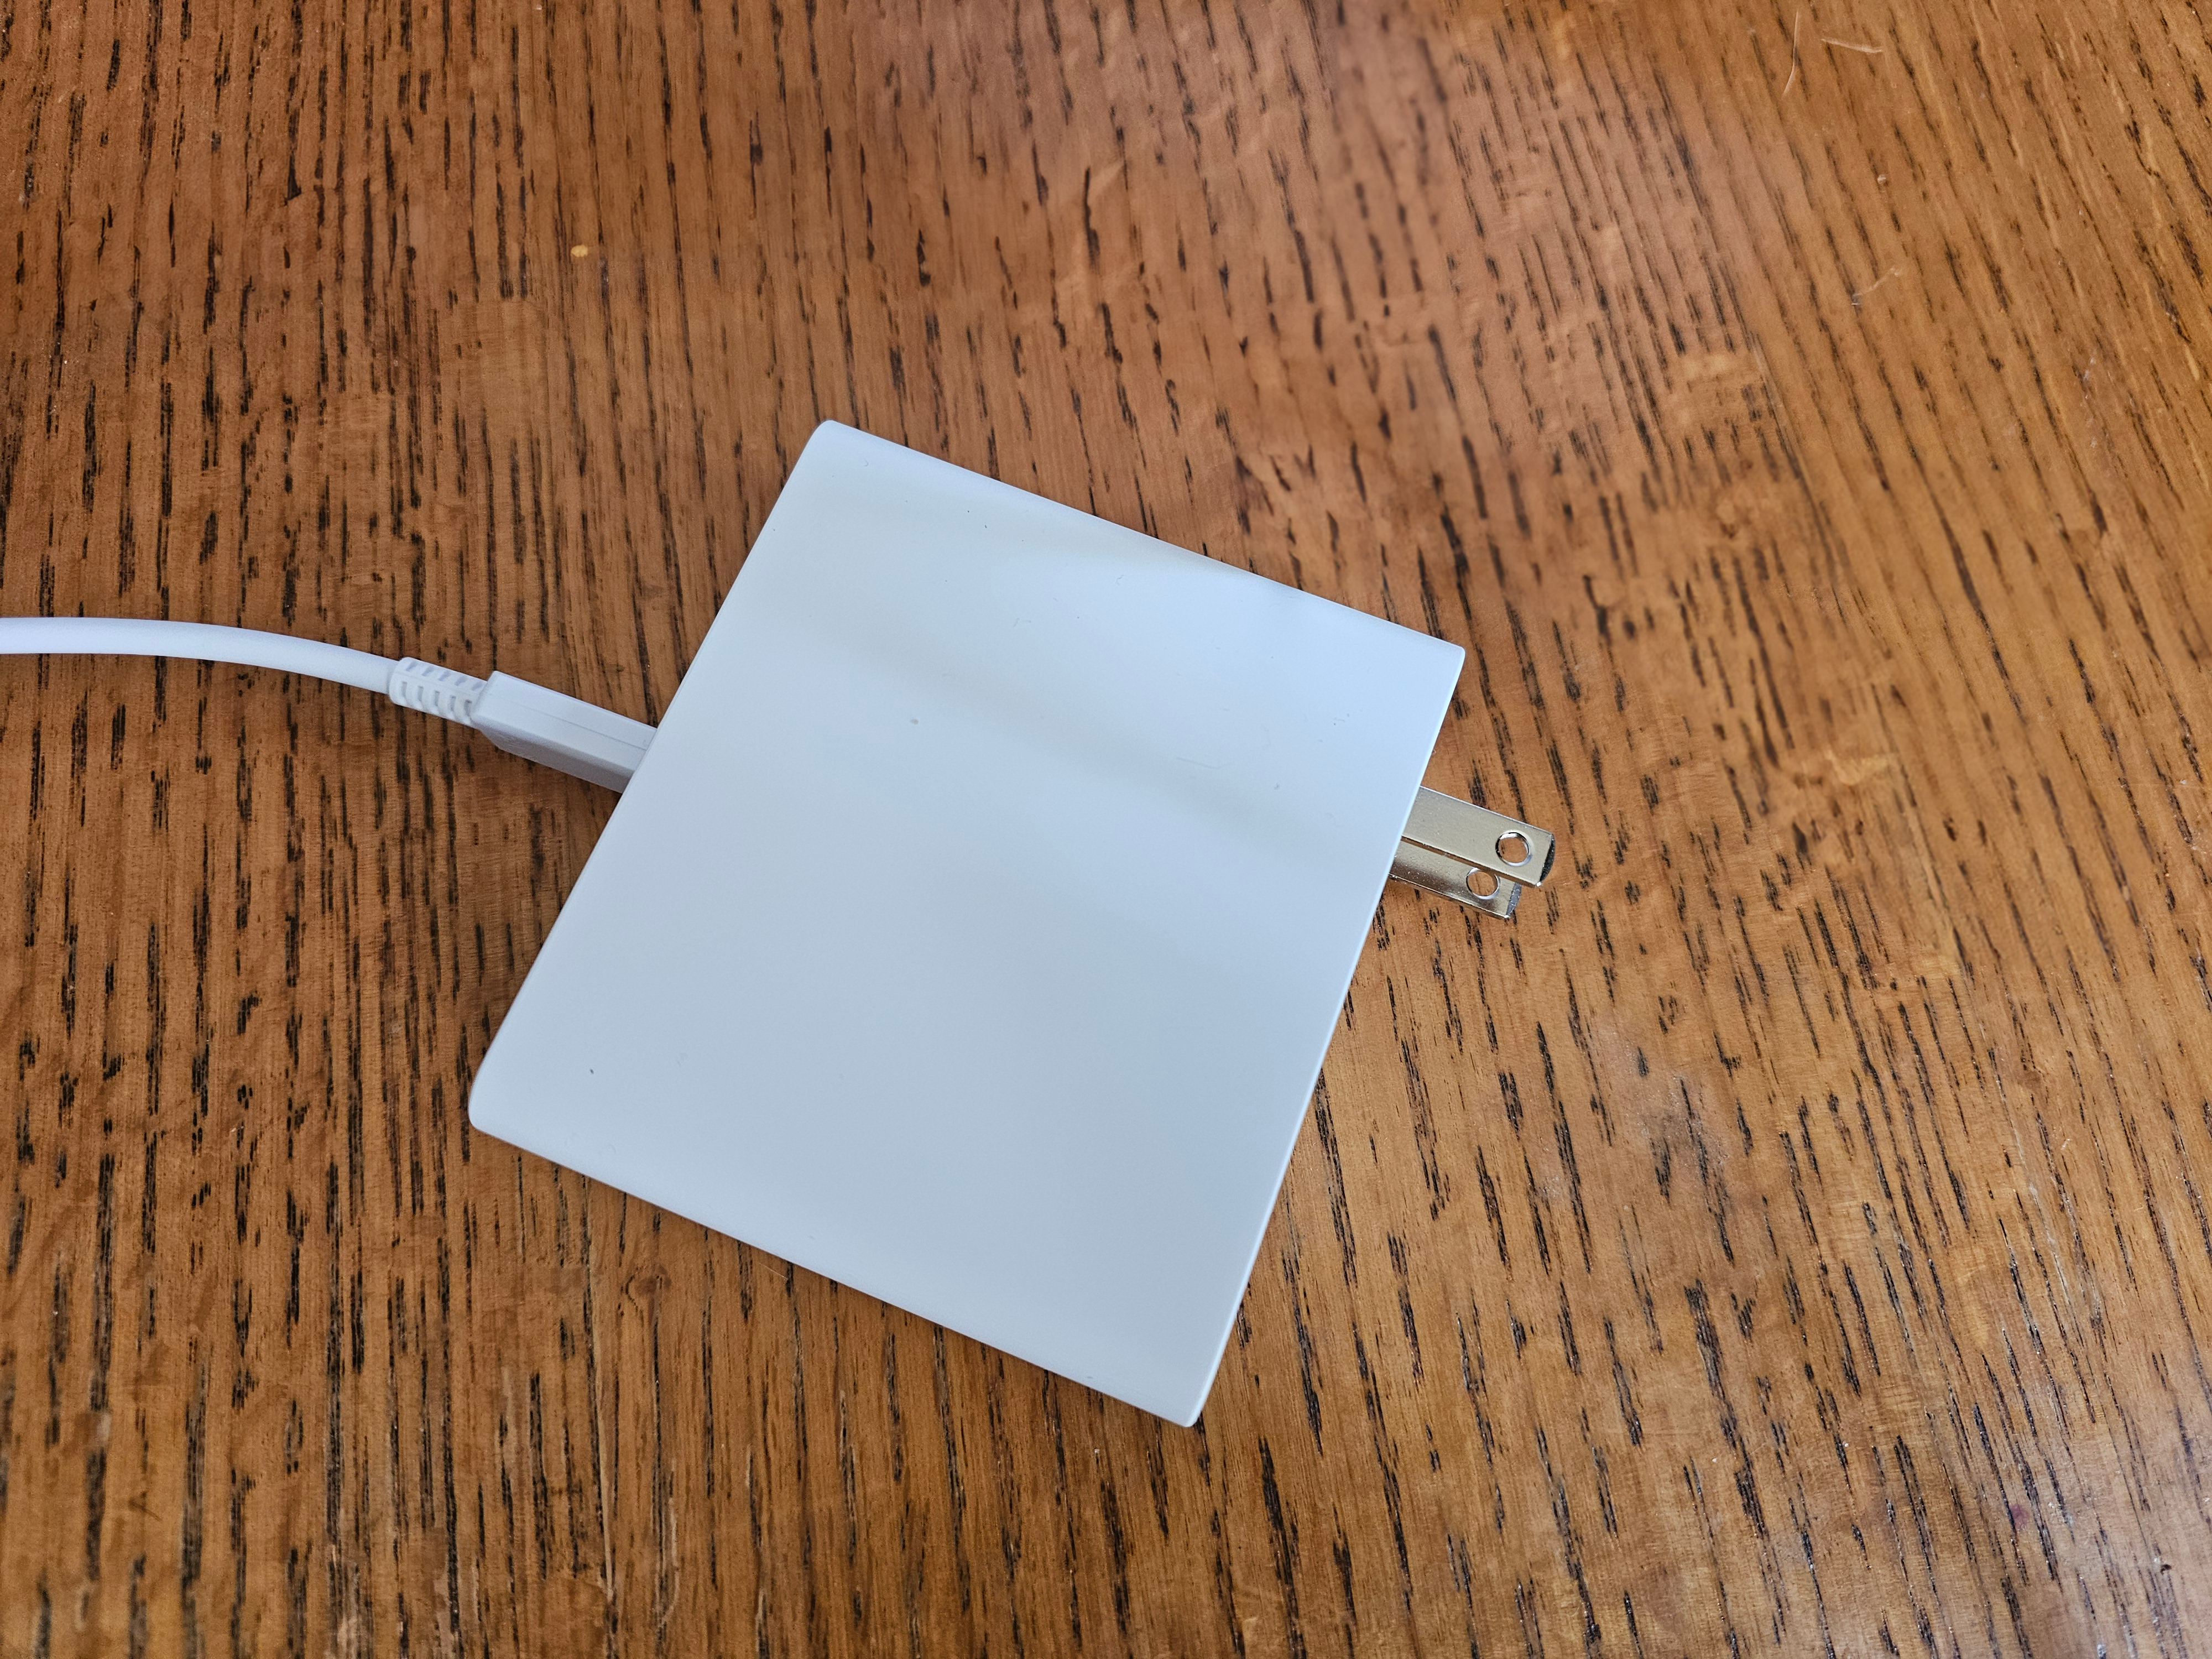
I used two of my own photos: a shot from the ferry to Alcatraz Island, and a very basic photo of a laptop charger and a cable snaking around it. In the first photo, I attempted to remove someone standing and partially blocking my shot of the island; in the second, I tried to “erase” some of the charging cable.

Mark Hachman / IDG
Mark Hachman / IDG
Mark Hachman / IDG

Mark Hachman / IDG
Mark Hachman / IDG
Mark Hachman / IDG
With Photoshop, you use the Remove tool in much the same way as Photos’ Generative Erase. Click J or long-press the “bandage” icon in the left-hand vertical nav bar to show the Remove tool. Then paint over the portion of the image to remove.
Clicking the “lasso” icon on the left-hand nav bar opens up the Magic Lasso. You can also “paint” the area to be removed, but it’s easier just to outline or “lasso” it. You should see a toolbar pop up as soon as you’ve lassoed the object, with a small “Generative Fill” button highlighted. Click it, and do not fill in the box unless you want AI to fill in the scene with something specific. Otherwise Photoshop will do all the work.
On the outdoor shot, there was simply too much going on for any of the solutions to work perfectly. In fact, the Photos’ Generative Erase and Photoshop’s Remove tool produced about the same results. But the Generative Fill option does a surprisingly good job.
Here’s Microsoft’s effort with Photos and Generative Erase:

Microsoft Photos’ Generative Erase doesn’t do a great job here trying to “erase” the man who partially blocked my shot.
Microsoft Photos’ Generative Erase doesn’t do a great job here trying to “erase” the man who partially blocked my shot.
Mark Hachman / IDG
Microsoft Photos’ Generative Erase doesn’t do a great job here trying to “erase” the man who partially blocked my shot.
Mark Hachman / IDG
Mark Hachman / IDG
And here’s what Adobe could do with it.
Note that there are undoubtedly photo-editing experts, that with time and the proper tools, could probably generate something that looked perfect to the naked eye. But I was looking for something that could solve my problem without a lot of fuss.


The left photo uses Photoshop’s Remove tool to try and “erase” the same man. On the right, I used Photoshop’s Generative Fill tool. The right-hand shot looks better, but there are still AI hallucinations, like the smaller tower emerging from the roof of the building.
With the simpler shot of the charger and its cables, both Photos and Photoshop got me 90 percent of the way there. If you knew that a cable existed, you could clearly see that neither Photos not Photoshop eliminated it completely. But it passes muster, at least if you’re not looking for a professional solution.
Again, we’ll use the Microsoft Windows Photos app with Generative Erase first. It looks pretty good. I may have been able to go over it a couple of times with the Erase tool to see if I could improve the edit.
Mark Hachman / IDG
Mark Hachman / IDG
Mark Hachman / IDG
Again, though. the Magic Lasso/Generative Fill technique proved superior. If you have an Adobe Creative Cloud subscription, using that option seems like it could be a genuinely useful way of quickly editing a photo.
Here are the two shots, again, using both techniques:

For this I used Adobe Photoshop again, using the Remove tool for the left-hand photo and the Generative Fill option for the right-hand photo.
Is Photoshop better? Depending on what tool you use within it, yes, probably. But you’ll pay at least $19.99 per month for Photoshop alone.
The difference, of course, is that Microsoft’s option is absolutely free as part of Windows. I don’t know about you, but I’ll take free any day of the week!
get windows 11 pro for free
Windows 11 Pro
Best Prices Today: €49.99 at PC-WELT Software-Shop – Windows 11 Home | €69.99 at PC-WELT Software-Shop – Windows 11 Pro
Personal Software
I like features that don’t take a lot of explanation, tutorials, or anything else. They should be intuitive and just work. And you know what? Generative Erase does just that — about as well as Photoshop does, too, and for free. Microsoft is rolling it out to Windows 11 right now, and Windows 10 users should see it, too.
get windows 11 pro for free
Windows 11 Pro
Best Prices Today: €49.99 at PC-WELT Software-Shop – Windows 11 Home | €69.99 at PC-WELT Software-Shop – Windows 11 Pro
You’ll want to use Generative Erase if you’ve ever taken a photo and want to remove those one or two objects that get in the way of a perfect shot. Maybe it was a photo of the beach, with a stray dog running in the background. Maybe it was a vacation photo…and your ex- snuck into the shot. Either way, Photos’ Generative Erase feature uses AI to interpret what you want cut out, and what it should be replaced with.
If you’re a longtime user of Photos, you’re probably aware that Microsoft has flirted on and off with an editing technology called Spot Fix. For me, Spot Fix has always been invaluable. You have no idea how much otherwise unseen dust and grime can make its way onto a laptop or peripheral, showing itself only after I’ve taken the picture. With Spot Fix, I can encircle the bit of dust or grime, click, and…boom! It’s gone. Generative Erase is like the improved version of Spot Fix: It simply allows you to “paint” an area you want removed.
How to use Generative Erase within Microsoft Photos
To use Generative Erase within Photos, you must first launch Photos. You can type Photos in Windows Search to launch it, or right-click an image file in File Explorer and open the app via that method. Photos won’t automatically save any edits you make without your permission, but you might want to make a copy of the file first, just to be safe.
When the photo file opens, you’ll need to then select the editing icon, which is the teeny-tiny little icon to the far left.
Mark Hachman / IDG
Mark Hachman / IDG
Mark Hachman / IDG
Photos offers a number of editing options, from basic crops to an AI filtering option that can be found under the Filter tab. But Generative Erase is in its own tab second from the right, marked “Erase.”
Mark Hachman / IDG
Mark Hachman / IDG
Mark Hachman / IDG
To use Generative Erase, you’ll need to “paint” the area that you want Photos to erase. I’d recommend that you first toggle off the “Auto Apply” option. Otherwise, the erase effect will be applied every time you click and release. That’s just fine for a small edit, but if you want to fine-tune your selection you’ll want the extra control.
Note that you can adjust the size of the “brush” or circle, and choose to add or subtract the mask. That’s a fancy way of saying that you have the option to “paint” the area in which you want to erase, but subtracting the mask allows you to trim it down if you’ve gone too far. When you’re ready, click “Erase.”
Use Generative Erase to “paint” over the stuff you want to remove.
Use Generative Erase to “paint” over the stuff you want to remove.
Mark Hachman / IDG
Use Generative Erase to “paint” over the stuff you want to remove.
Mark Hachman / IDG
Mark Hachman / IDG
This isn’t the only AI-dependent editing function within Photos; the Background tab on the far right let’s you use AI to remove the background entirely, if that suits you.
Photoshop vs. Photos: Which erases unwanted objects the best?
Because I couldn’t just stop there, I wanted to know whether Photos’ Generative Erase actually does a better job than the granddaddy of photo editors, Adobe Photoshop. I use Photoshop all the time for something Photos can’t do: Generative Expand, which uses AI to add part of the photo that never existed. It’s really helpful when vendors provide a narrow product shot and I need to “extend” the photo’s background to fit our image parameters.
I compared Photos’ Generative Erase to two Photoshop functions: the Remove tool, which is essentially Adobe’s version of Generative Erase; and the sort-of backwards Generative Fill option, where I used the Photoshop Magic Lasso to outline an object, then used the Generative Fill option to remove the object and fill it in with an AI-generated background. The latter isn’t all that intuitive, but it works.
I used two of my own photos: a shot from the ferry to Alcatraz Island, and a very basic photo of a laptop charger and a cable snaking around it. In the first photo, I attempted to remove someone standing and partially blocking my shot of the island; in the second, I tried to “erase” some of the charging cable.
Mark Hachman / IDG
Mark Hachman / IDG
Mark Hachman / IDG
Mark Hachman / IDG
Mark Hachman / IDG
Mark Hachman / IDG
With Photoshop, you use the Remove tool in much the same way as Photos’ Generative Erase. Click J or long-press the “bandage” icon in the left-hand vertical nav bar to show the Remove tool. Then paint over the portion of the image to remove.
Clicking the “lasso” icon on the left-hand nav bar opens up the Magic Lasso. You can also “paint” the area to be removed, but it’s easier just to outline or “lasso” it. You should see a toolbar pop up as soon as you’ve lassoed the object, with a small “Generative Fill” button highlighted. Click it, and do not fill in the box unless you want AI to fill in the scene with something specific. Otherwise Photoshop will do all the work.
On the outdoor shot, there was simply too much going on for any of the solutions to work perfectly. In fact, the Photos’ Generative Erase and Photoshop’s Remove tool produced about the same results. But the Generative Fill option does a surprisingly good job.
Here’s Microsoft’s effort with Photos and Generative Erase:
Microsoft Photos’ Generative Erase doesn’t do a great job here trying to “erase” the man who partially blocked my shot.
Microsoft Photos’ Generative Erase doesn’t do a great job here trying to “erase” the man who partially blocked my shot.
Mark Hachman / IDG
Microsoft Photos’ Generative Erase doesn’t do a great job here trying to “erase” the man who partially blocked my shot.
Mark Hachman / IDG
Mark Hachman / IDG
And here’s what Adobe could do with it.
Note that there are undoubtedly photo-editing experts, that with time and the proper tools, could probably generate something that looked perfect to the naked eye. But I was looking for something that could solve my problem without a lot of fuss.
The left photo uses Photoshop’s Remove tool to try and “erase” the same man. On the right, I used Photoshop’s Generative Fill tool. The right-hand shot looks better, but there are still AI hallucinations, like the smaller tower emerging from the roof of the building.
With the simpler shot of the charger and its cables, both Photos and Photoshop got me 90 percent of the way there. If you knew that a cable existed, you could clearly see that neither Photos not Photoshop eliminated it completely. But it passes muster, at least if you’re not looking for a professional solution.
Again, we’ll use the Microsoft Windows Photos app with Generative Erase first. It looks pretty good. I may have been able to go over it a couple of times with the Erase tool to see if I could improve the edit.
Mark Hachman / IDG
Mark Hachman / IDG
Mark Hachman / IDG
Again, though. the Magic Lasso/Generative Fill technique proved superior. If you have an Adobe Creative Cloud subscription, using that option seems like it could be a genuinely useful way of quickly editing a photo.
Here are the two shots, again, using both techniques:
For this I used Adobe Photoshop again, using the Remove tool for the left-hand photo and the Generative Fill option for the right-hand photo.
Is Photoshop better? Depending on what tool you use within it, yes, probably. But you’ll pay at least $19.99 per month for Photoshop alone.
The difference, of course, is that Microsoft’s option is absolutely free as part of Windows. I don’t know about you, but I’ll take free any day of the week!
get windows 11 pro for free
Windows 11 Pro
Best Prices Today: €49.99 at PC-WELT Software-Shop – Windows 11 Home | €69.99 at PC-WELT Software-Shop – Windows 11 Pro
Personal Software